Getting Started · 4 MIN READ
User Management
User Management
User Management in Hansa is found under Others in the top navigation. Go to Others > User Management to open it. Inside you will find three tabs: Members, Team, and Role.
Members
The Members tab shows everyone who currently has access to Hansa, with the following columns:
- Name and Email ID
- Team(s) — which Hansa teams they belong to
- Added On — the date they were given access
- Status — Active (green) or Suspended (red)
- Action — click View to open their detail page
Use the search bar to find a specific member, or the filter icon to narrow by status or team.
Adding a User
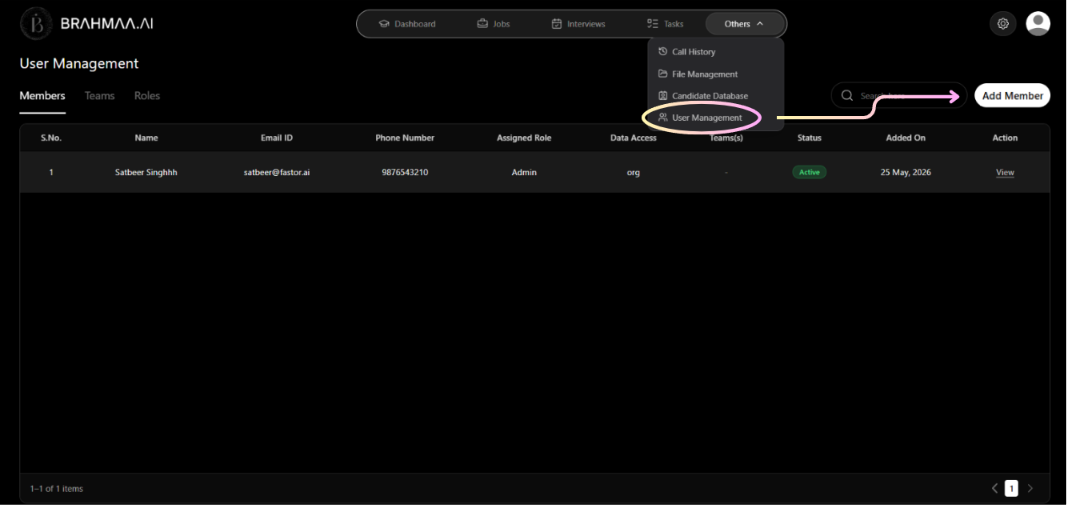
Click Add Member in the top right corner. A modal opens with a search bar.
If the person is already in your Brahmaa organisation:
- Search by name or email — they will appear in the dropdown
- Select them. They move into the Added Members list
- You can select multiple people at once
- For each person, pick a role from the Select Role dropdown
- Click Add Member to confirm
If the person is not yet in your organisation, they will appear in the search results with a + Invite button. Clicking it opens the Invite Member form.
Inviting Someone to Join
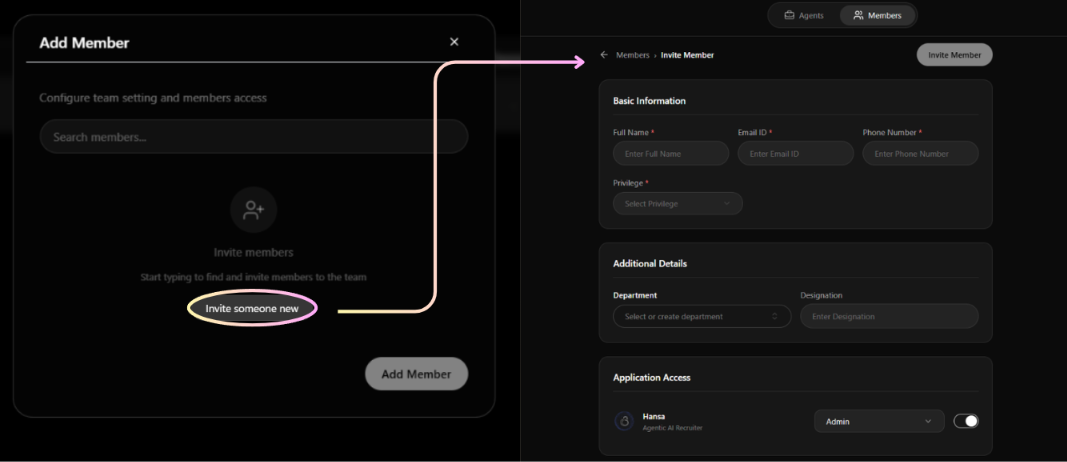
If someone does not have a Brahmaa account yet, you can invite them directly from User Management. Fill in:
- Basic Details — Full Name, Email ID, Phone Number, and Privilege level
- Application Access — toggle on the apps you want them to access (e.g. Hansa, Varuna) and set their role for each
- Additional Details — Department and Designation (optional)
Click Invite Member. They receive an invitation email and appear in the Members list with a New tag until they accept.
Teams
The Team tab lists all existing Hansa teams with their name, number of members, and creation date.
Creating a Team
- Click Create Team
- Enter a Team Name
- Search for members and select them from the list
- Click Create Team to confirm
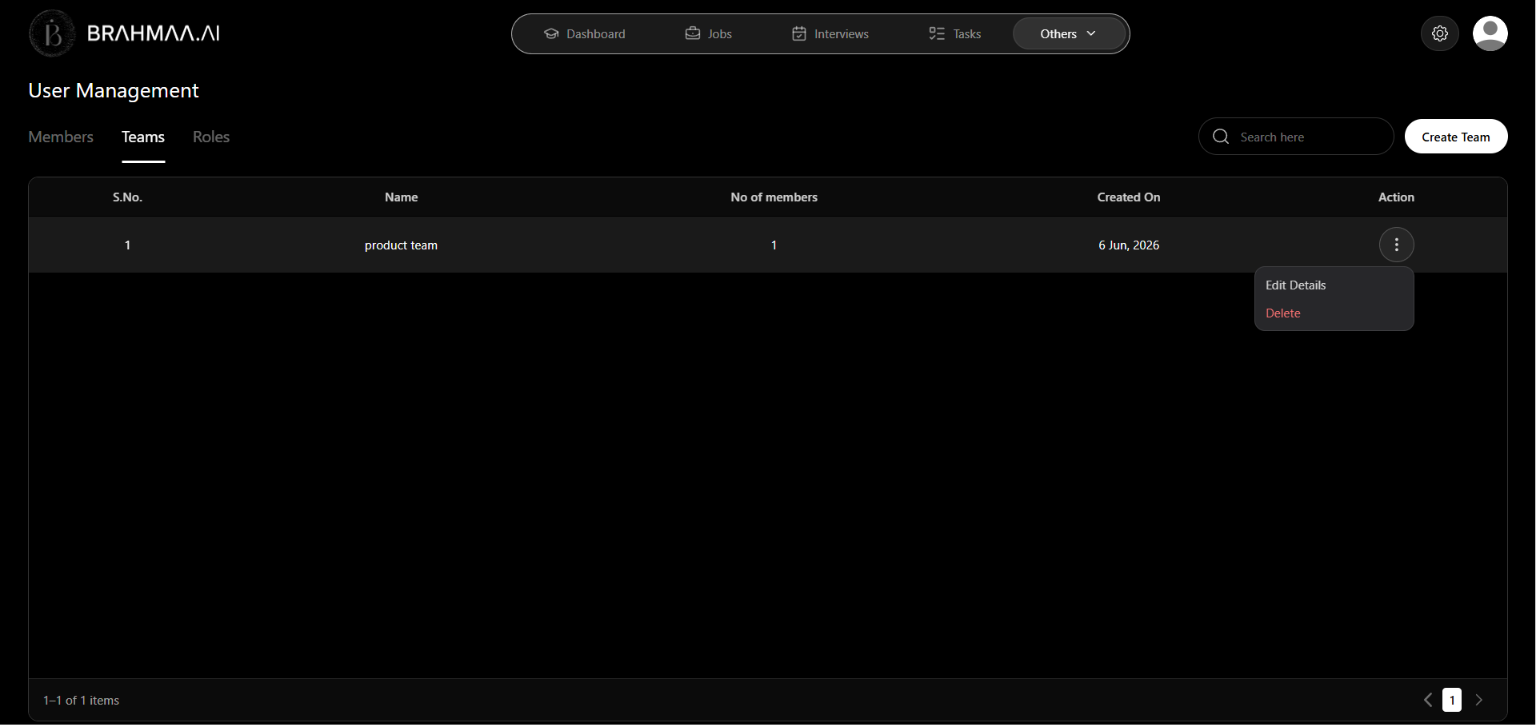
Editing a Team
Click the action menu on any team row and select Edit Details. You can rename the team or remove members by clicking the X next to their name. Click Save when done.
Deleting a Team
Click the action menu on the team row and select Delete.
Roles & Permissions

The Role tab shows all roles in Hansa — both system defaults and any custom ones your team has created. Each role card displays its name, how many users are assigned to it, its data access scope, and a summary of its permissions.
Permission Levels
Every module in a role can be set to one of three levels:
| Permission | What it allows |
|---|---|
| View | Read-only access to the module |
| Create/Edit | Can create records and make changes |
| Full | Complete access including deletion and advanced actions |
Permissions can be set individually for: Jobs, Interviews, Candidates, Tasks, Assessments, File Management, and Integration. File Management can be expanded to set permissions at a more granular level across Job Descriptions, Offer Letters, Task Files, Candidate Documents, and Mail Templates.
Data Access Levels
A role's data access scope controls how much of Hansa's data a user can see, regardless of their module permissions:
| Scope | What the user can see |
|---|---|
| Self | Only data they created, are assigned to, or that has been explicitly shared with them. Typical for Interviewers and Evaluators. |
| Team | Their own data plus all data belonging to their team(s). Typical for Managers and Recruiters. |
| Organisation | All data across Hansa, unrestricted. Typical for Admins and Heads. |
Creating a Custom Role
If the default roles do not fit your team structure, you can create a custom role.
- Click Add New Role on the Role tab
- Enter a Role Name
- Select a Data Access Level (Self, Team, or Organisation)
- Use the Permissions Matrix to set View, Create/Edit, or Full for each module
- Click Save Role. The new role is available immediately when adding or editing users.
Was this article helpful?
Getting Started