Creating a Job · 1 MIN READ
Step 3: Designing Your Pipeline
Step 3 — Job Pipeline
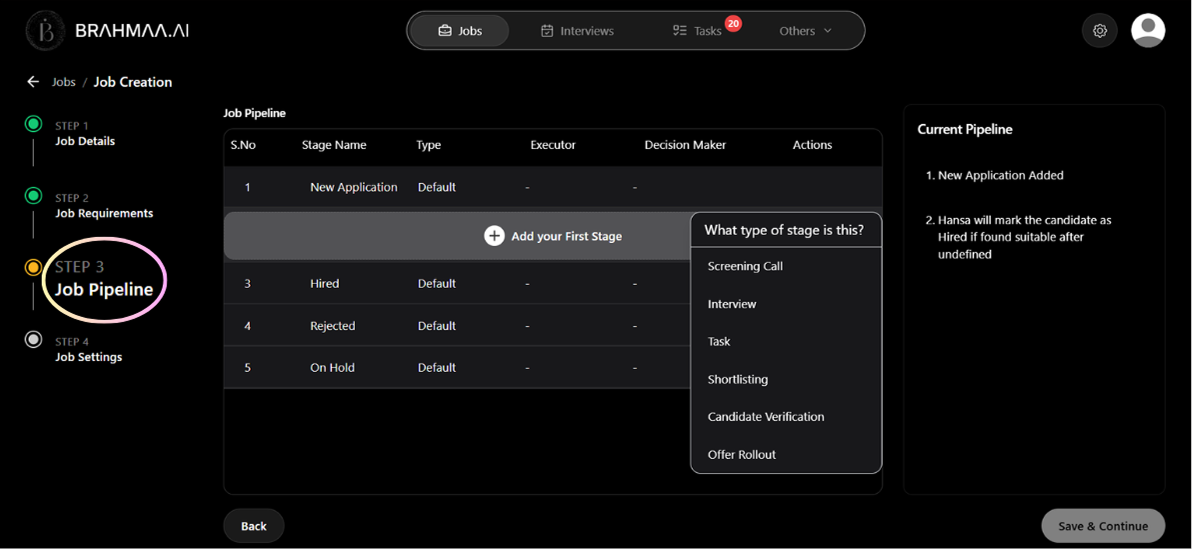
Design the candidate journey — the sequence of stages every applicant will move through. Four stages are permanent and cannot be removed:
| Default Stage | Purpose |
|---|---|
| New Application | The entry point. Every candidate starts here. |
| Hired | The final positive outcome stage. |
| Rejected | For candidates who do not pass any stage. |
| On Hold | For candidates you want to pause without rejecting. |
Click '+ Add Stage' to insert custom stages between these. Six stage types are available:
| Stage Type | What it does | Typical Position |
|---|---|---|
| Screening Call | Phone-based assessment — AI or human asks questions, evaluates answers, decides pass/fail | First active stage |
| Shortlisting | Silent data-driven filtering using AND/OR rules — no contact with candidate | After screening |
| Interview | Human-led evaluation — Hansa handles scheduling, reminders, and calendar invites | After screening or shortlisting |
| Task | Practical assignment sent to candidate with deadline tracking and reminders | After screening or interview |
| Candidate Verification | Collects documents like ID, certificates, and experience letters | After interviews, before offer |
| Offer Rollout | Sends the offer letter and collects the signed copy | Final stage before Hired |
Tip: Recommended pipeline for most roles: Screening Call → Shortlisting → Interview → Task → Candidate Verification → Offer Rollout.
Was this article helpful?
Creating a Job